The final presentation comes neatly packaged into one container and is divided into several segments:
- The box
- The vinyl sleeve
- The plastazote base
- The corner tabs (what hold the vinyl sleeve at sufficient height to pick up and serve as a lid)
Materials used where:
- Acrylic

- Plastazote

- Laser cutting machine (inside the workshop facilities and outside)
- Plastic cement
The plastazote was something I decided to add later on, I realised that the best way of neatly and safely packaging and exhibiting the shell speaker while not being used was to have it fixed into it’s own shape. I had two ways of going around this issue, bearing in mind that my replica is still curing inside its mold, and the original cannot be used because it will not have the imperfections the replica might come with. I could vac form it, or laser cut material to house it.
Vac forming demanded too much of my time and as the deadline was creeping in closer I decided laser cutting the material would be quicker, cleaner and more efficient. That would have been the case, but I envisioned a thickness of about 10-12 mm and instead I had 3 and 6 to play with. In the end I decided to cut one sheet of 3 mm plastazote with the shape of the original shell, which I vectorized by scanning the shell’s shadow (measuring 3D objects is not the most accurate). The shape sadly doesn’t fit completely, so this is definitively one of the things I would love to redo. Plus I had to cut another sheet of 3mm foam to place underneath as the shell was deeper.
Here are the sketches I made for the plastazote layer.


I designed both boxes, and although my initial design appears to not have any flaws, I did measure wrong and the result was slightly off in several areas because of it.
The base of my box was larger than the lid of the sleeve, so it could slot in and have a snug fit within the box, but I made a mistake. I should have had in consideration that to create the correct perimeter I had to make two of the sides slightly shorter and two of them to go all the length of the side.
Instead I sized it the following way:
Base 33x33
L& R 32x22
F&B 32x22
Complete sleeve once assembled 32x32x6mm
Base 33×33
L& R 32×22 I made the mistake of making the sides smaller than the base, which led to several issues:
The first one was that at least 5 mm of the base was peaking out from the sides of the box. Secondly, this meant that the top component of the sleeve would not slide in( exactly same measurements as the perimeter of the box, so the bottom part sat on top of the corner tabs while the lid had the tiniest of grips over it. The way I made up for that mistake was raising the placement of the tabs to the highest point possible to achieve maximum safety of the lid.
F&B 32×22
Complete sleeve once assembled 32×32
Another way I tweaked the design of the box to achieve a good grip on the lid was subtracting a small u portion of material at the top of the sides, that way by pressing the fingers from underneath of the sleeve it will gently come off.
Below are both files that I prepared for the laser cutting services. Note that the sleeve is marked in red and the other file in blue. This is due to the different settings with which several laser cutting facilities work with.


In the end everything worked out, not as seamlessly as I would have preferred but all in all it is a functional working design. I really enjoyed working with this medium, although I’d like to point out its highly reflective surface catches on a lot of dust, particles and fingerprints as well as being very prone to scuffs and scratches. Ideally four transparent gel stoppers at each corner of its base would greatly improve this situation as well as providing extra stability.
From working with this material I also came across a rather innocent looking adhesive: Plastic Weld (Methylene Chloride). Although it has passed the H&S check with the technicians at the 3D workshop, I would not use it again without a fume cabinet. For part of the project I had to finish gluing it at home and it’s odourless fumes where terrible to inhale. If I will retake this process at any given point I would proceed with extreme care.


The sleeve also presented some difficulties, as the strips of material for the sides were extremely thin and refracted the light in strange ways, it was not easy to align, plus if not glued perfectly the sides would give in in the areas that they are subjected to most pressure.


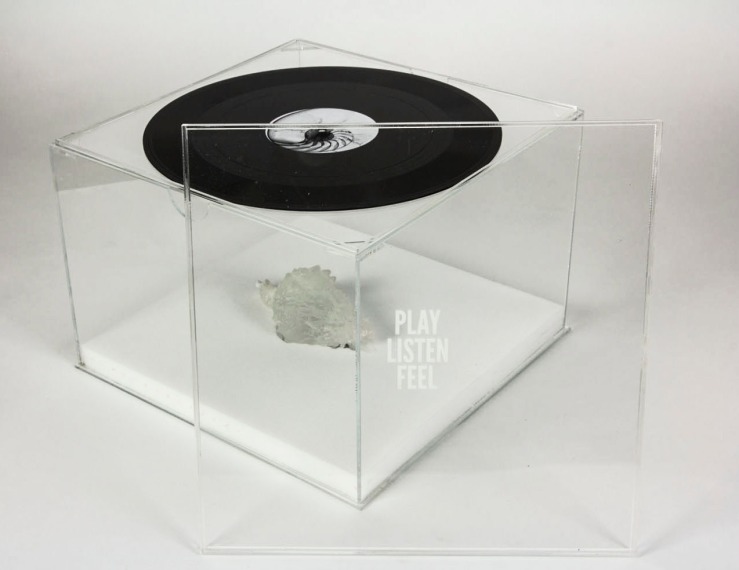
And tadaaá! Here it is at its best: